Pluck Your Own App: Capturing Dashboards and Pages Behind a Login
- guide
- extension

Most people install Pluck to borrow from other people's websites. The use we see growing fastest is the opposite: people plucking their own product.
That sounds odd until you try it. Your app is the one site you cannot screenshot-and-describe your way around, because you already know every detail and still cannot get a model to reproduce it. Pluck fixes that, and it works on your app for the same reason it works on everything else: it runs inside your browser.
Why login walls are not a problem
Pluck is a Chrome extension. It reads the page that is already rendered in your tab, using your session, your cookies and your permissions. It never fetches the URL on its own. So anything you can see in the browser, you can pluck:
- Your SaaS dashboard, signed in as yourself.
- An admin panel on an internal domain.
- A localhost dev server at http://localhost:3000.
- A staging deploy behind basic auth or a VPN.
- A client's app you have been given access to.
There is no "paste a URL" mode in Pluck, which people occasionally ask for. The reason is the one above: a URL fetcher would never see the states you care about, and it would break on every login screen. Your browser already has the page open. Pluck just reads it.
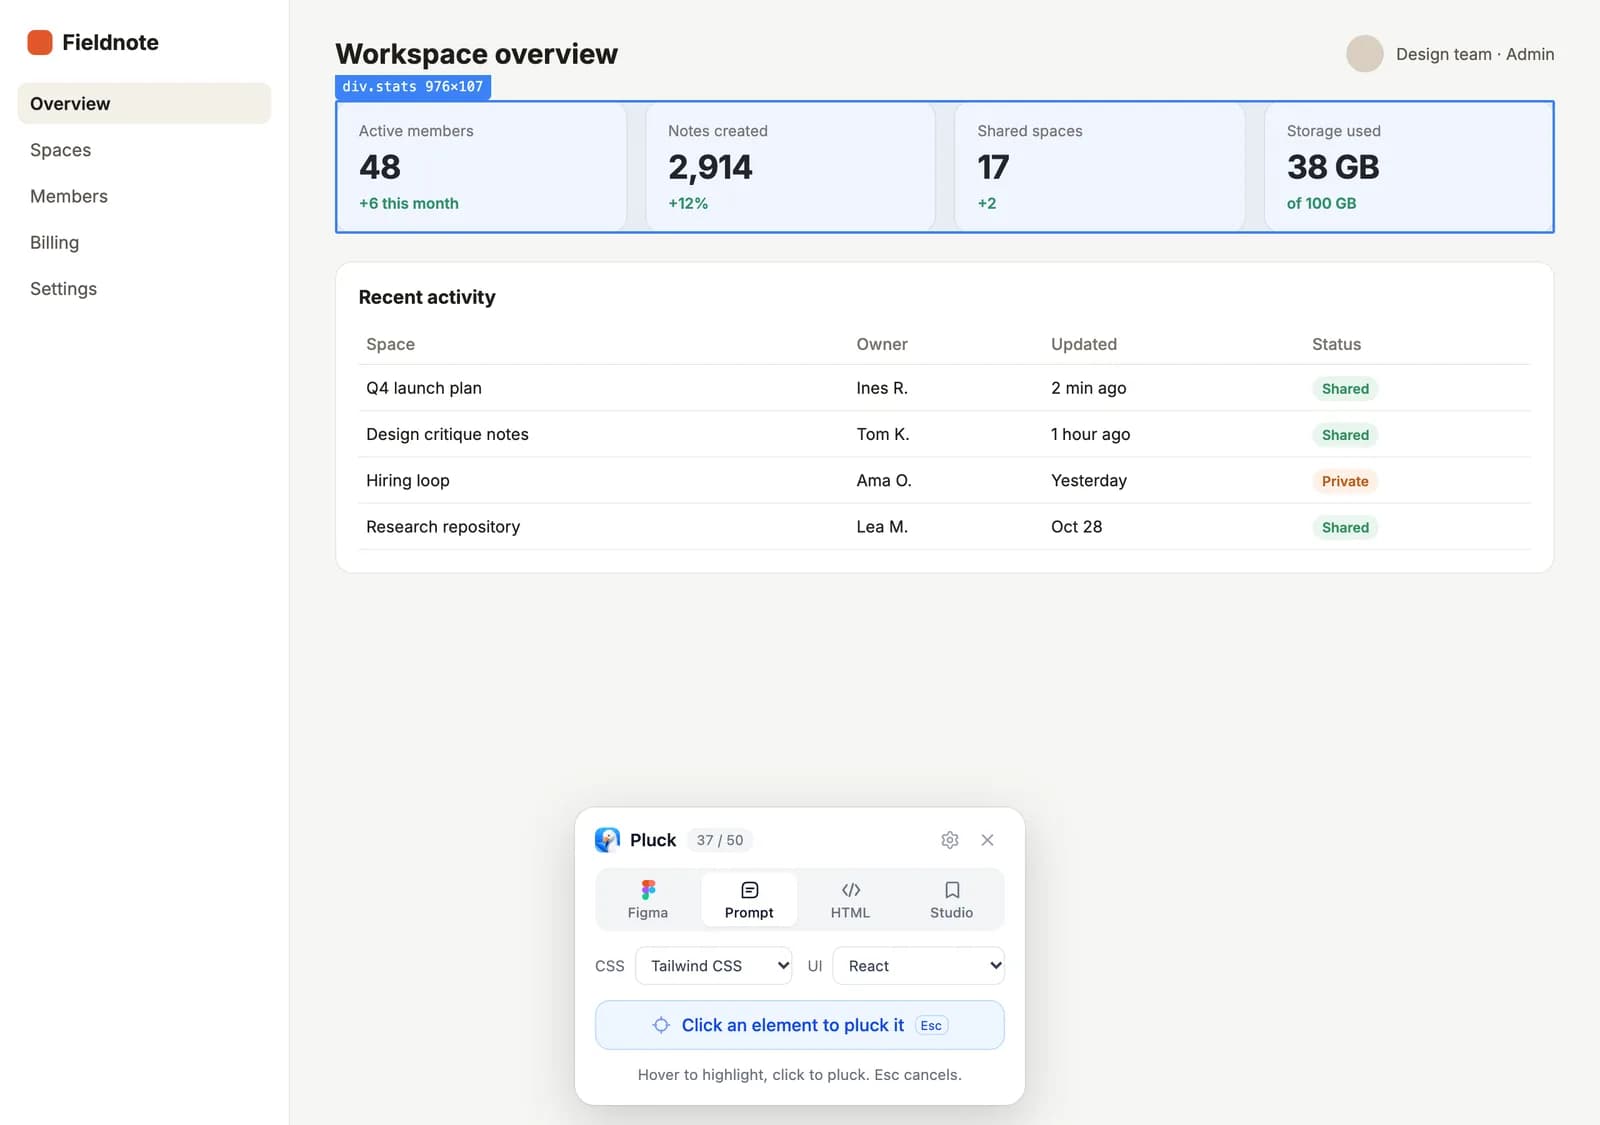 A signed-in dashboard plucks like any other page: Pluck reads what your tab already shows.
What gets captured
A pluck of your own UI records the same things as a pluck of anyone else's:
- The element tree with computed styles for every node: layout, flexbox and grid, spacing, colours, typography, borders, shadows, transforms, images.
- How the component changes at each responsive breakpoint.
- A screenshot, copied alongside the text in AI prompt mode and stored with the pluck in your library.
Everything is captured as rendered. If the data on screen is real customer data, that is what will be in the screenshot and the text nodes. More on that below.
Four things to do with plucks of your own app
1. Redesign a screen without rebuilding it from memory
Say your settings page has grown into a tall list of toggles and you want to restructure it into tabs. Pluck the whole settings page, save it to Studio, and open a board.
Connect the pluck to a prompt along with one or two external references (a settings page you admire from another product). Brief it:
Restructure the connected settings page into three tabs: Profile,
Billing, Notifications. Keep every control that exists today. Match the
visual style of the connected reference for tab navigation. Keep our
colours and font.
Because the pluck carries your real styles, the generation keeps your product looking like your product, and the reference only contributes the structure you asked for. Run it a few times, iterate with each and combine, and take the winner to Figma or to a coding agent. The full loop is in Redesign a Landing Page with References; it works the same for an app screen.
2. Give your coding agent the real component, not a description
This is the one that pays off daily. When you ask Claude Code or Cursor to "add a filter dropdown to the orders table that matches the existing one on the customers page", the agent has to find the existing one in your codebase, which can take several tool calls and still miss the computed result of a theme, a Tailwind plugin or a CSS variable set three files away.
Instead: open the customers page, pluck the existing dropdown, and paste it into the agent with one line:
Add a filter dropdown to the orders table. Here is the one from the
customers page, reproduce it exactly using our existing components.
The agent now has the rendered truth, including the hover and focus styles, the exact padding, and the breakpoint behaviour, which is faster and more accurate than reconstructing it from source. If you have set the stack picker to match your project (say Tailwind with React), the prompt is already in the right vocabulary.
How to Copy a Website Component into Claude Code walks through the paste step in detail. The same idea works for Cursor, Codex and the rest.
3. Keep a visual record of what shipped
Every pluck is saved to your Studio library with its screenshot, source page and style data. If you make a habit of plucking the main screens after each release, the library becomes a reverse-chronological record of how the product looked, filterable by site.
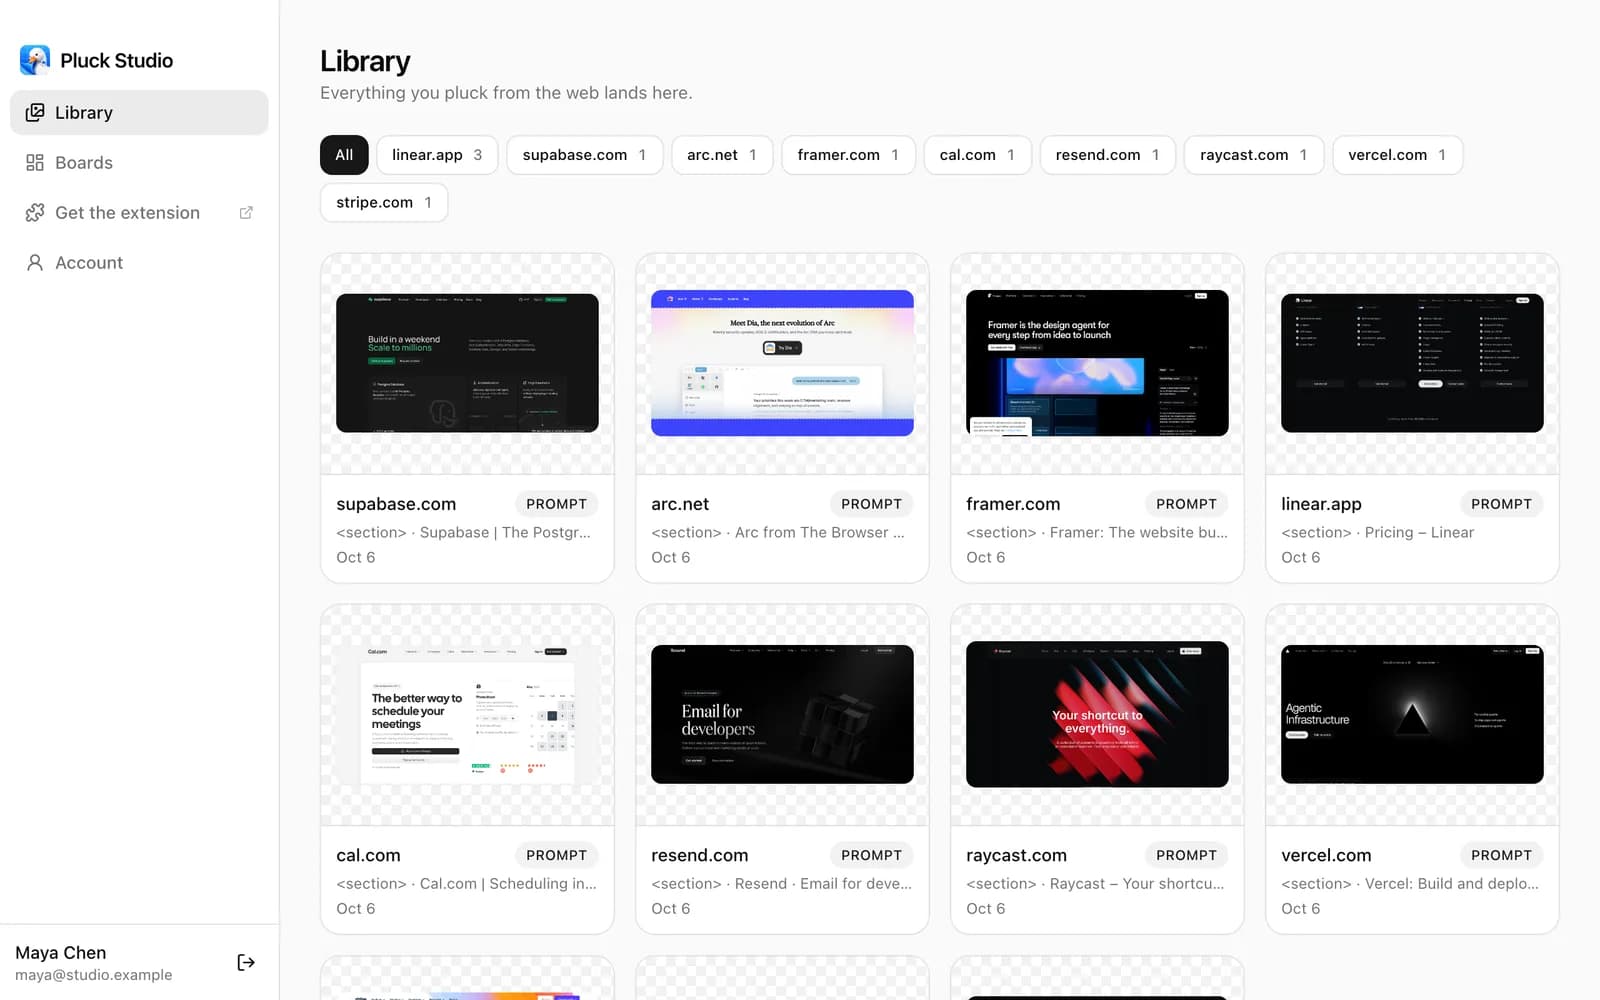 The Studio library keeps every saved pluck with its screenshot, filterable by site.
This is handy when someone asks "what did the pricing page look like in August?" and nobody kept a screenshot. It is also a lightweight way to collect before-and-after pairs for a changelog or a design review.
4. Export your own UI to Figma
Design teams sometimes need the live product back in Figma: a component was built in code and never existed in the design file, or the file has drifted from what shipped. Pluck the component, choose Copy as Figma, paste. You get editable vector layers with real text, fills, borders and radii, which is far quicker than redrawing it. How to Clone Any Website to Figma covers the Figma side.
Tips for plucking your own app
Pluck the state you want. Trigger the empty state, expand the row, open the panel. Pluck captures what is rendered at the moment you click, so set the page up first. Menus that close on blur are the awkward case: pin them open with your app's own controls or a dev toggle if it has one, then pluck.
Resize for mobile. Pluck records responsive breakpoints, but if you want the mobile layout as the primary capture, narrow the browser window before plucking. Responsive by Default explains what is recorded at each width.
Use a test account. The screenshot and the text content are captured as is. If the page shows customer names, revenue numbers or anything else you would not want in a prompt or a library entry, sign in to a seeded test account or a staging environment first. Studio stores plucks in your account, and you can delete individual plucks or export everything, but the simplest policy is not to capture sensitive data in the first place.
Turn off library saving when you need to. If you are plucking from an internal tool and do not want anything stored, switch off library saving in the extension settings. Plucks then go to your clipboard only.
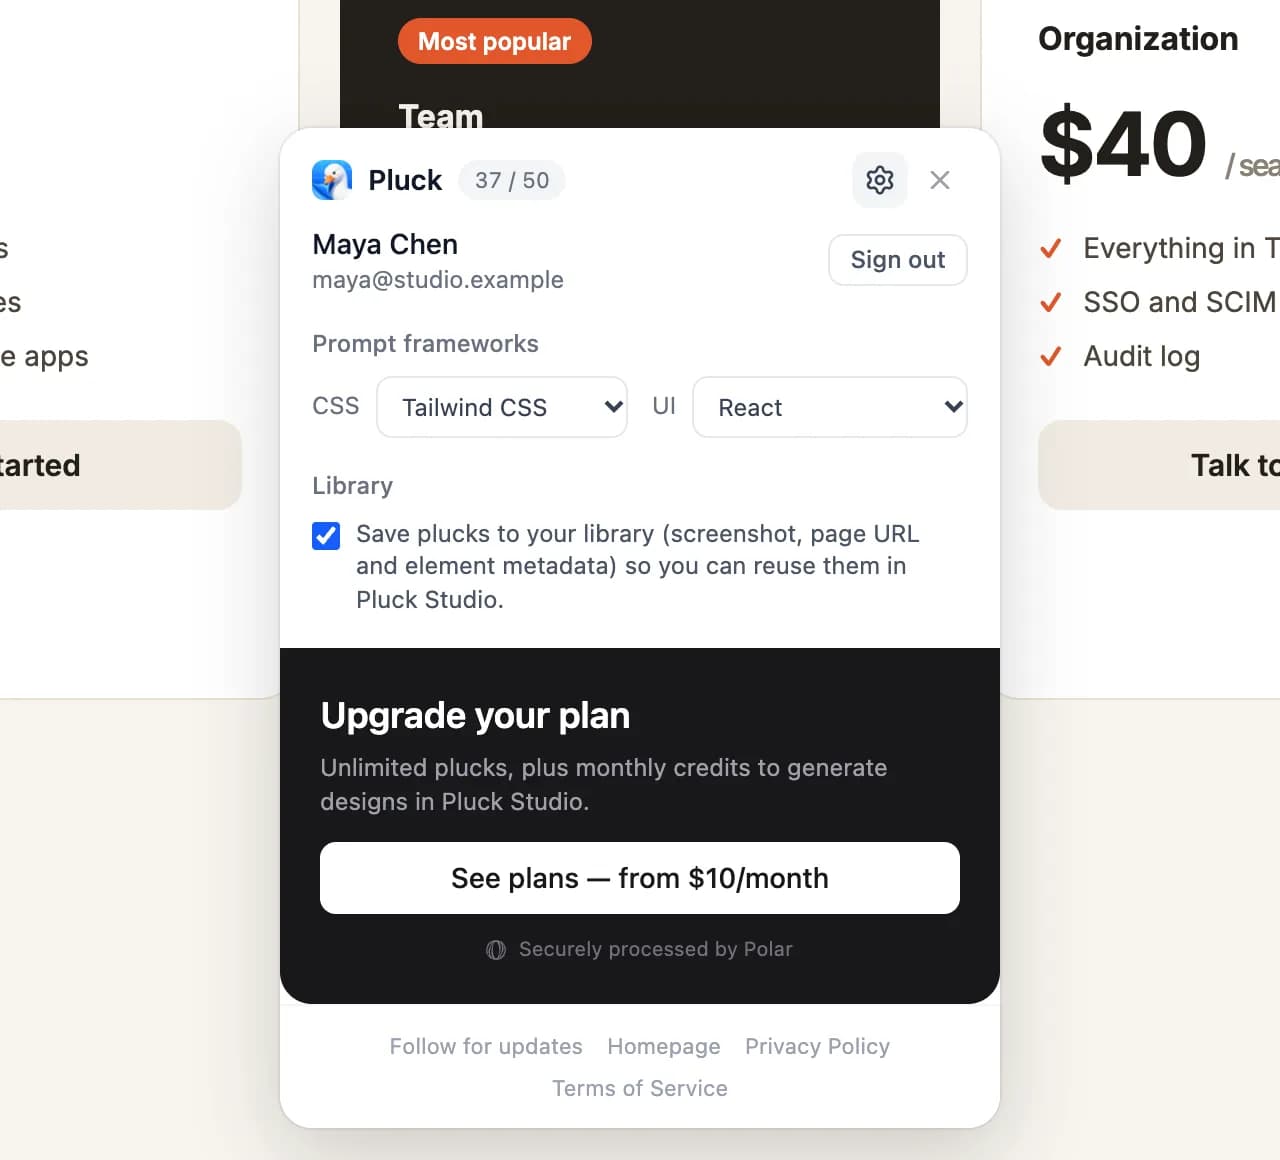 Library saving is a checkbox in the extension settings.
Localhost works. Point your dev server at any port, open it in Chrome, pluck. This is the fastest loop of all: change code, reload, pluck, paste into the agent, repeat.
A note on access
Pluck does not bypass anything. If you cannot see a page, Pluck cannot see it either. The capture happens on your machine, in your tab, with your credentials. For your own app, that is the whole point: you are capturing something you are already allowed to look at, at the exact moment and in the exact state you chose.
If you have only ever used Pluck on other people's sites, open your own product today and pluck one screen. Then paste it into your coding agent and ask for something small. The difference in how much it gets right the first time is the reason we built this.
Install Pluck if you have not yet, or open Pluck Studio to see what is already in your library.